Excel tutorials

The only Excel books you will ever need

  • The only constantly updated Excel 365 titles more…
  • Thoroughly covers Power Pivot and Power Query more…
  • Covers business intelligence and OLAP features more…
  • Simple, easy, understandable, 2-page lessons more…
  • Available as both printed books and e-Books more…
  • Used by schools, colleges and universities  more…
  • Available for 365, 2021, 2019, 2016 and Mac versions more…

The Excel SEQUENCE function is one of the new dynamic array functions introduced in the July 2020 semi-annual Excel 365 update.  

This lesson showcases the power of dynamic arrays as you build a perpetual calendar in a few moments using the new SEQUENCE dynamic array function.

Dynamic arrays change best-practice for a huge number of common Excel tasks and  I’m really excited about this huge leap forward for Excel.  So much so that I added a new 24-lesson session Working with Dynamic Arrays session to the July 2020 fourth edition of my Expert Skills book.  The new session seeks to empower Excel users with a complete mastery of dynamic arrays.

This article is an unedited lesson from one of the 24 short focused lessons in the new Dynamic Arrays session. 

Leave me a comment if you find the article useful.

Lesson 4-16: Create a perpetual calendar using the Excel SEQUENCE function

1. Open the sample file Calendar-1 in Excel.

calendar at start of tutorial

The user interface allows a user to select a year and month.  You created year and month data for the drop-down lists using the SEQUENCE function in: Lesson 4‑15: Use an Excel SEQUENCE function.

2. Add an Excel SEQUENCE function to cell B8 to populate the calendar with date serial numbers that relate to the chosen Year and Month.

  • Click in cell B8.
  • Click: Formulas->Function Library->Math & Trig->Sequence. 

The Excel sequence function’s Function Arguments dialog appears:

Excel SEQUENCE function arguments dialog

Clearly you need to populate five rows and seven columns with dates to complete the calendar. 

  • Type: 5 into the Rows box.
  • Type: 7 into the Columns box.

You now need to consider the starting value.

In: Lesson 3 7: Understand date serial numbers, you learned that every date in Excel is represented by a number. 

The Start argument (the number that needs to be returned to cell B8) needs to be the serial number for the first day in the month defined in the Year and Month drop-down lists (in cells C4 and C5).

In: Lesson 3 11: Use the DATE function to offset days, months and years, you learned about the DATE function. The DATE function accepts a Year, Month and Day argument (all of which must be numbers) and returns a date serial number.

It should be clear that the formula:

=DATE(C4, Data!B3, 1) 

… will return the correct date serial number for cell B8 (the number that starts the sequence).

  • Type : DATE(C4, Data!B3, 1)

… into the Start box. The Insert Function dialog should now look like this:

Excel sequence function arguments dialog II

You can see that the first date serial number returned (in this example) is 44013.  That’s because I had selected Jul for the month and 2020 for the year. 

44013 is the date serial number for 1st July 2020.

  • Click the OK button.

The calendar is filled with date serial numbers:

Calendar showing date serial numbers

3. Format the date serial numbers to display as days.

Because the calendar only needs to show day numbers it is necessary to format the date serial numbers to display as days.

  • Select cells B8:H12.
  • Right-click on any selected cell.
  • Click Format Cells… from the shortcut menu.
  • Click Custom in the left-hand Category list.
  • Type the format character: d into the Type box.
Excel sequence function arguments dialog III

This custom format code formats a date as a single number (with no leading zeroes) representing the day. 

  • Click the OK button.

Day numbers are now shown in the body of the calendar.

Calendar converted to days of the month

4. Add the correct days of the week to cells B7:H7.

  • Type this function into Cell B7:

=TEXT(B8:H8,”ddd”)

This function takes the date serial numbers found in cells B8:H8 and formats them as three-letter day names.

calendar with days of the week header

5. Save your work as Calendar-2.

Here’s the sample file at the end of the session.  If you ran into any problems you can study the finished calendar to identify the problem.

This lesson is excerpted from the above book. 

This is the only up-to-date Excel book currently published and includes an entire session devoted to the new Dynamic Arrays features.

It is also the only book that will teach you absolutely every Excel skill including Power Pivot, OLAP and DAX.

Covered in Session 12 – Power Pivot, Data Modelling, OLAP and Business Intelligence

Covered in Lesson 12-20: Use the CUBEVALUE function to query a data model.

Covered in Session 13: An Introduction to DAX

Covered in Lesson 12-6: Use an OLAP pivot table to analysze data residing in a data model.

Covered in Lesson 11-33 Create a merged query using fuzzy logic.

Covered in Session 10: 3D Maps.

Covered in Lesson 11-7: Create and use a custom data type.

Covered in Lesson 9-2: Use Natural Language Queries.

Covered in Lesson 11-8: Use custom data types in formulas.

Covered in Lesson 9-1: Use automatic data analysis to create data insights.

Related Articles

Calculating loan payment dates

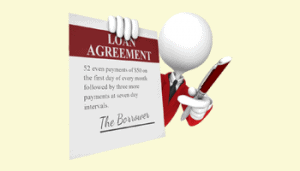
Calculating Loan Payment Dates

This article shows how to calculate loan payment dates in Excel, using a formula that can calculate loans of any length and number of periods.

Share this article

Leave a Reply

Your email address will not be published. Required fields are marked *

Which tutorial do you need?